In my prior blogs, I wrote about the difficulties I encountered in using WSL for the TinyFPGA Verilog tool chain.
TL;DR - Run
and re-install Ubuntu app.TL;DR - Run
wslconfig /u Ubuntu in a DOS command prompt. WSL may need to be manually deleted by uninstalling and removing the CanonicalGroupLimited.Ubuntu{...} directory in %USERPROFILE%\AppData\Local\Packages\. Uninstall the Windows "Apps & Features" Ubuntu app, then visit https://aka.ms/wslstore
As a reminder, do not modify WSL filesystem file from Windows! Yes, I've seen some pretty weird things happen when I tested that. But feel free to edit any other files. For instance, the entire
C:\ directory is available in WSL as /mnt/c/
.
As it turns out, the biggest problem was the version of Ubuntu I had. Although I didn't think I had it installed for all that long - it was way outdated.
The first thing to do: completely wipe out the old Ubuntu. I found some instructions on removing Ubuntu - that included both of these options:
From DOS Prompt:
lxrun /uninstall /full
or also from DOS Prompt:
DEL /S %localappdata%\lxss\
I didn't have the lxrun command, nor a C:\Users\gojimmypi\AppData\Local\lxss directory. I tried DOS command prompt, a powershell prompt, the Windows bash prompt (C:\Windows\system32\bash.exe) and Ubuntu prompt. Indeed according to Microsoft, lxrun is deprecated as of Windows 10 1803 and later
. As noted in a prior blog, my Ubuntu was installed in this directory:
C:\Users\gojimmypi\AppData\Local\Packages\CanonicalGroupLimited.UbuntuonWindows_79rhkp1fndgsc\LocalState\rootfs\home\gojimmypi
To help find it, you can run a command like this in your WSL instance:
echo wow > ~/zowie.tag
then from a DOS command-prompt:
C:\Users\gojimmypi>dir zowie.tag /s
 Volume in drive C is Windows
 Volume Serial Number is 9078-2015
 Directory of C:\Users\gojimmypi\AppData\Local\Packages\CanonicalGroupLimited.UbuntuonWindows_79rhkp1fndgsc\LocalState\rootfs\home\gojimmypi
02/03/2019  01:43 PM                 4 zowie.tag
               1 File(s)              4 bytes
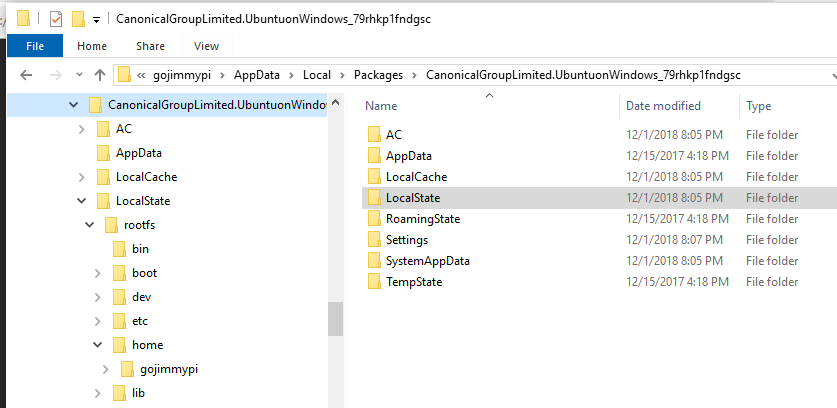
So in my case, Ubuntu needed to be removed from
C:\Users\gojimmypi\AppData\Local\Packages\CanonicalGroupLimited.UbuntuonWindows_79rhkp1fndgsc
I was reluctant to try the brute-force directory deletion route. In part, I've seen where Windows did not "see" the proper file sizes and permissions. I eventually found the wslconfig command .
del CanonicalGroupLimited.UbuntuonWindows_79rhkp1fndgsc /s /q > null:wslconfig /list
pause
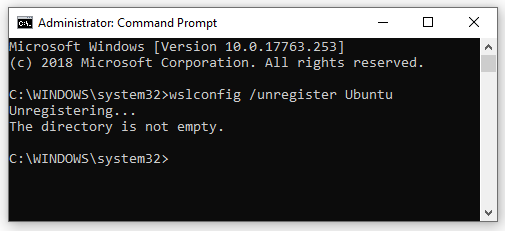
wslconfig /unregister distroname
That didn't go so well:
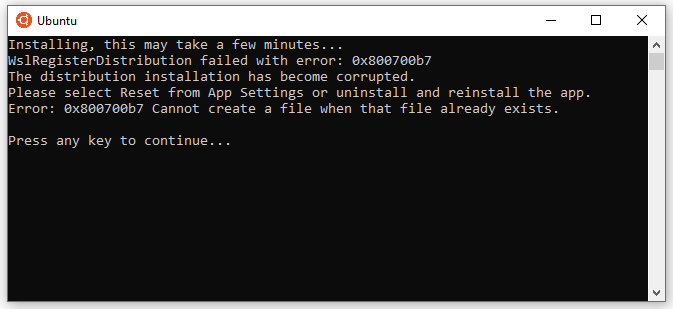
And it didn't just fail, but corrupted the install:
Sometimes I really wonder why I continue to fuss with the Microsoft environment. :/
So in the end, I ran the brute-force directoy delete like this:
del CanonicalGroupLimited.UbuntuonWindows_79rhkp1fndgsc /s /q > null:
wslconfig /unregister distroname
The /s deletes all subdirectories. The /q is "quiet mode" (don't confirm every directory to delete), and I send output to null: as the RISC-V toolchain is massive, and showing all that on the screen would take forever. That actually didn't work, either - leaving behind a ton of directories. So then I tried:
rmdir CanonicalGroupLimited.UbuntuonWindows_79rhkp1fndgsc /s /q
which also did not work, giving an error: CanonicalGroupLimited.UbuntuonWindows_79rhkp1fndgsc\LOCALS~1\rootfs\lib\recovery-mode - The directory is not empty.
So I continued to manually delete directories manually until everything was gone. Running WSL from a DOS command prompt shows that nothing is installed: 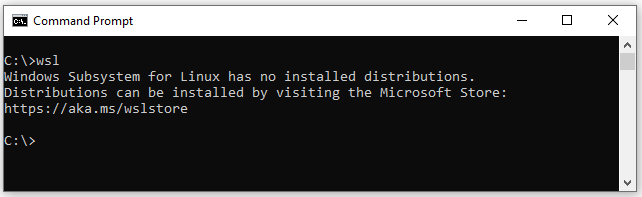
So on to installing Ubuntu fresh from the Microsoft Store - Linux on Windows
upon launching the Ubuntu, we should be able to confirm we have version 18.04 installed:
You may wish to setup a custom bash prompt like mine (or see bashrcgenerator.com ).
Finally on to installing the tool chain again. I've created a TinyFPGA install gist :
Installing, this may take a few minutes...
Please create a default UNIX user account. The username does not need to match your Windows username.
For more information visit: https://aka.ms/wslusers
Enter new UNIX username: gojimmypi
Enter new UNIX password:
Retype new UNIX password:
passwd: password updated successfully
Installation successful!To run a command as administrator (user "root"), use "sudo
You may wish to setup a custom bash prompt like mine (or see bashrcgenerator.com ).
Finally on to installing the tool chain again. I've created a TinyFPGA install gist :
mkdir -p ~/workspace/
cd ~/workspace/
git clone https://gist.github.com/243fc3a6eead72ae3db8fd32f2567c96.git TinyFPGA_Toolchain
cd TinyFPGA_Toolchain
chmod +x TinyFPGA_Toolchain.sh
sudo ./TinyFPGA_Toolchain.sh
Or if you prefer:
sudo ls # pause if copy/paste password prompt
sudo apt-get update --assume-yes
sudo apt-get upgrade --assume-yes
mkdir -p ~/workspace/
cd ~/workspace/
# install icestorm dependencies
# this next install needs a bit of disk space:
#   0 upgraded, 205 newly installed, 0 to remove and 3 not upgraded.
#   Need to get 130 MB of archives.
#   After this operation, 652 MB of additional disk space will be used.
#
sudo apt-get install build-essential clang bison flex libreadline-dev \
                     gawk tcl-dev libffi-dev git mercurial graphviz   \
                     xdot pkg-config python python3 libftdi-dev  --assume-yes
# tinyFPGA BX
git clone --recursive https://github.com/tinyfpga/TinyFPGA-BX.git
cd ~/workspace/
# icestorm
git clone https://github.com/cliffordwolf/icestorm.git icestorm
cd icestorm
make -j$(nproc)
sudo make install
cd ~/workspace/
# arachne-pnr
git clone https://github.com/cseed/arachne-pnr.git arachne-pnr
cd arachne-pnr
make -j$(nproc)
sudo make install
cd ~/workspace/
# nextpnr
git clone https://github.com/YosysHQ/nextpnr.git
# this next line is about another half gig of files!
#   0 upgraded, 249 newly installed, 0 to remove and 3 not upgraded.
#   Need to get 132 MB of archives.
#   After this operation, 623 MB of additional disk space will be used.
#
sudo apt-get install libboost-all-dev python3-dev qt5-default clang-format
cd nextpnr
cmake -DARCH=ice40 .
make -j$(nproc)
sudo make install
cd ~/workspace/
# yosys
git clone https://github.com/cliffordwolf/yosys.git yosys
cd yosys
make -j$(nproc)
sudo make install
cd ~/workspace/
#RISC-V
git clone https://github.com/cliffordwolf/picorv32.git
sudo mkdir /opt/riscv32i
sudo chown $USER /opt/riscv32i
sudo apt-get install autoconf automake autotools-dev curl libmpc-dev \
        libmpfr-dev libgmp-dev gawk build-essential bison flex texinfo \
    gperf libtool patchutils bc zlib1g-dev git libexpat1-dev  --assume-yes
Follow @gojimmypi
Copyright (c) gojimmypi all rights reserved. Blogger Image Move Cleaned: 5/3/2021 1:35:54 PM