After the previous pains of getting Circuit Python to just build for the FOMU, it is time to move on to more interesting things.... actually putting it on the FOMU!
Back to my first notes on this topic, the dfu-util is needed. There are a variety of sources of this app. Unfortunately the only one I was able to get working was from the ad-spam-laden sourceforge (it's really a shame what that site has become). Fortunately there's a ULX3S dfu-util repo with a precompiled binary. No ads. (If you, too are tired of so may ads, check out my pi-hole blog ).
At this early stage of the game, there's really quite limited documentation available. One observation from the Makefile is that during the (by default relatively quiet) build of Circuit Python... the only thing happening there is just that: the RISC-V (more specifically VexRiscv) compile of "C" code into a binary DFU file. This means that the FOMU needs to have been pre-configured: make the FPGA a soft CPU.
Fortunately, I had already loaded foboot onto my FOMU. Specifically, I took the shortcut of using a pre-built version of hacker-updater-v2.0.3.dfu as noted here . To do something using with another FPGA, say... the ULX3S... clearly I'm going to have to get control of building that bitstream.
But for now, let's run with that. The FOMU is configured as a soft CPU, which we learned from the Circuit Python text file is a VexRisc. The "only" thing needed is some code for it to run: Circuit Python.
There's an apt-get install version of dfu-util for Ubuntu, but it does not work in WSL. It does not "see" the FOMU
gojimmypi:~
$ which dfu-util
/usr/bin/dfu-util
gojimmypi:~
$ sudo dfu-util -l
[sudo] password for gojimmypi:
dfu-util 0.9
Copyright 2005-2009 Weston Schmidt, Harald Welte and OpenMoko Inc.
Copyright 2010-2016 Tormod Volden and Stefan Schmidt
This program is Free Software and has ABSOLUTELY NO WARRANTY
Please report bugs to http://sourceforge.net/p/dfu-util/tickets/
gojimmypi:~
There's another one that came with the FOMU Toolchain mentioned in my previous blog
, but that one does not work either, giving instead this error message:
gojimmypi:~
$ /opt/fomu-toolchain-linux_x86_64-v1.5.6/bin/dfu-util -l
dfu-util 0.9
Copyright 2005-2009 Weston Schmidt, Harald Welte and OpenMoko Inc.
Copyright 2010-2019 Tormod Volden and Stefan Schmidt
This program is Free Software and has ABSOLUTELY NO WARRANTY
Please report bugs to http://sourceforge.net/p/dfu-util/tickets/
unable to initialize libusb: LIBUSB_ERROR_OTHER
gojimmypi:~
Of course, I'm doing this in WSL (not WSL2).. and there are known problems with native USB drivers not working in WSL. Given the libusb error, I'm pretty sure neither of those linux versions of dfu-util will ever work. However, one of the amazing things about WSL: Native Windows and DOS apps can be launched from the command prompt! The DOS version does
work!
WORKSPACE=/mnt/c/workspace
cd $WORKSPACE
git clone https://github.com/ulx3s/dfu-util.git
$WORKSPACE/dfu-util/bin-win64/dfu-util.exe -l
This should identify the FOMU installed:
dfu-util 0.9
Copyright 2005-2009 Weston Schmidt, Harald Welte and OpenMoko Inc.
Copyright 2010-2016 Tormod Volden and Stefan Schmidt
This program is Free Software and has ABSOLUTELY NO WARRANTY
Please report bugs to http://sourceforge.net/p/dfu-util/tickets/
Found DFU: [1209:5bf0] ver=0101, devnum=12, cfg=1, intf=0, path="1-1.3", alt=0, name="Fomu Hacker running DFU Bootloader v2.0.3", serial="UNKNOWN"
Note that I have DFU Bootloader v2.0.3 installed on the FOMU as described in my prior blog. In particular, see tinyusb issues #293 for some oddities that I encountered when using older versions of the bootloader. See also WSL Issue 2185 and 3745
regarding native USB drivers in WSL.If you need to make:
make BOARD=fomu clean
make BOARD=fomu
The send the firmware to the device:
cd $WORKSPACE/circuitpython/ports/litex
$WORKSPACE/dfu-util/bin-win64/dfu-util.exe  -D ./build-fomu/firmware.dfu
Note that this is a "soft" program of the FPGA. The firmware.dfu
can't be sent to the FOMU again until power cycle. In fact, after a power cycle, it *needs* to be sent again. Normally I might say something about preventing corruption to be careful to to the USB eject. But after removing the device, it is no longer a Circuit Python.For reference, to put foboot in place:
WORKSPACE=/mnt/c/workspace
cd $WORKSPACE
mkdir -p fomu
cd fomu
wget https://github.com/im-tomu/foboot/blob/master/releases/v2.0.3/hacker-updater-v2.0.3.dfu
# for WSL, we need the DOS executable with usblib support:
$WORKSPACE/dfu-util/bin-win64/dfu-util.exe -D hacker-updater-v2.0.3.dfu
# for regular linux:
# dfu-util -D hacker-updater-v2.0.3.dfu
The thing is: we don't have a bootloader for the ULX3S. It does not show up as a device for dfu-util. Recall we use the ujprog to upload FPGA bitstreams to the FPGA, and the litex_term to upload the firwmware.bin file.As noted in a prior blog, I have a soft CPU script that shows how this is done on the ULX3S:
WORKSPACE=/mnt/c/workspace
cd $WORKSPACE/litex-boards/litex_boards/targets/soc_basesoc_ulx3s/gateware
$WORKSPACE/ulx3s-examples/bin/ujprog.exe top.bit
cd $WORKSPACE/circuitpython/ports/litex/build-ulx3s
litex_term --serial-boot --kernel firmware.bin /dev/ttyS15
Unfortunately, I've spent a bunch of time chasing toolchain and memory problems. After updating everything to solve a problem where Migen was not creating a top.v file (which as it turns out, was even not necessary to solve the problem I was seeing), LiteX is now complaining that memtest is failing.
My specific memory chip on my ULX3S is a AS4C32M16SB . I did at least learn how to do a memory check:
git clone https://github.com/emard/ulx3s-bin.git
cd $WORKSPACE/ulx3s-bin/fpga/memtest/memtest-85k
# be sure to select the correct bit file 32MB or 64MB for your specific memory chip
$WORKSPACE/ulx3s-examples/bin/ujprog.exe ulx3s_85f_memtest_32MB_190MHz_300deg.bit
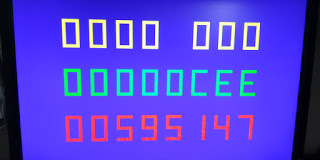
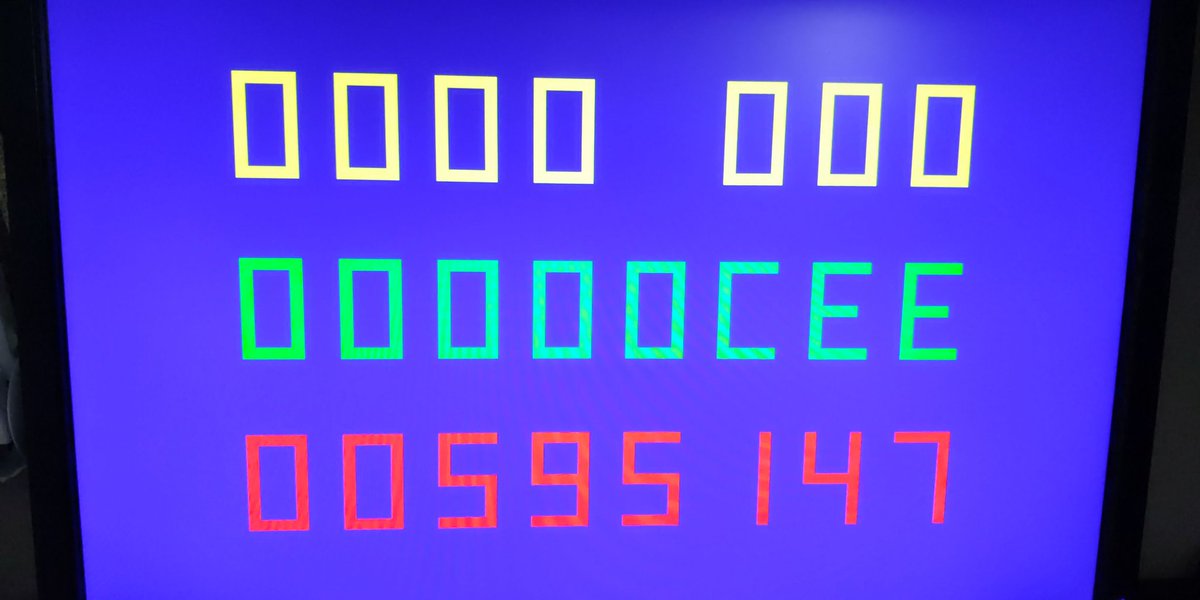
A good memory test looks like this on an HDMI monitor:
The top line is not used. The middle line is the number of memory tests completed. The red bottom line is the number of errors.
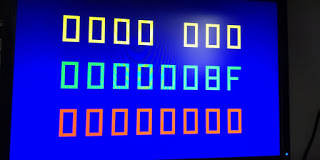
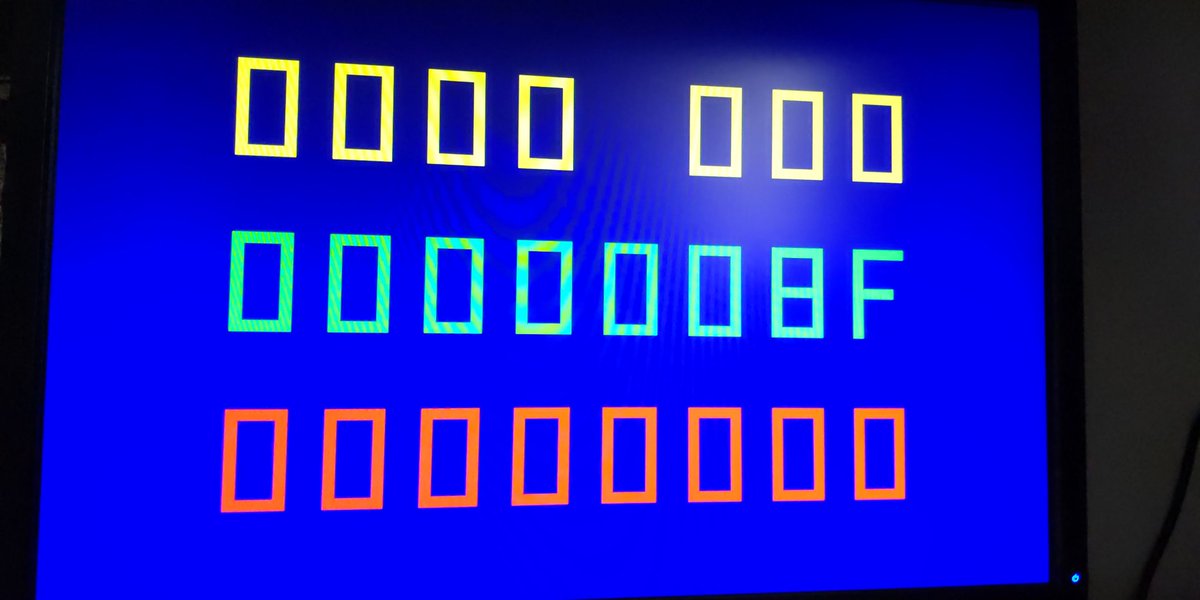
A bad memory test, say when a 64MB test is loaded for a 32MB chip, looks like this:\\
The 64MB test blinks onboard LEDs like this . The 32MB test does not.
In the meantime, there are some really quite talented folks that do this stuff rather easily . Perhaps I'll have more luck next time.
See also: Adafruit Circuit Python Issues 2604: Fomu port of CircuitPython
The top line is not used. The middle line is the number of memory tests completed. The red bottom line is the number of errors.
A bad memory test, say when a 64MB test is loaded for a 32MB chip, looks like this:\\
The 64MB test blinks onboard LEDs like this . The 32MB test does not.
In the meantime, there are some really quite talented folks that do this stuff rather easily . Perhaps I'll have more luck next time.
See also: Adafruit Circuit Python Issues 2604: Fomu port of CircuitPython
Copyright (c) gojimmypi all rights reserved. Blogger Image Move Cleaned: 5/3/2021 1:35:54 PM