I first started reverse engineering the STM32 based programmable power supply as described in a prior blog post. The more I dug into Johan's code, the more impressed I became. There's a real gem stashed away in his project: the ocd-client.py utility. This is a work of genius!
Rather than play on my only DPS, I instead did some experimenting using the STM32_Smart V2 device, with a simple blink app installed.
I learned how to use OpenOCD with GDB with the UDemy class by Peter Dalmaris called Advanced Arduino Boards and Tools . Although this was an Arduino-specific class - the instructions are the same for the STM32 devices.
First, the OpenOCD server needs to be running (in this case with the Segger J-Link):
cd ~/workspace/opendps/openocd/scripts
sudo openocd -f interface/jlink.cfg -f target/stm32f1x.cfg
# orsudo openocd -f interface/stlink-v2.cfg -f target/stm32f1x.cfg
With no other OpenOCD client connected (e.g. gdb not running!), we can inspect the GPIO Port C like this:
cd ~/workspace/opendps
./ocd-client.py gpioc
That command should return something like this:
GPIOC settings
CRL      : 0x44444444  [0x40011000]
CRH      : 0x44344444  [0x40011004]
IDR      : 0x0000e000  [0x40011008]
ODR      : 0x00002000  [0x4001100c]
BSRR     : 0x00000000  [0x40011010]
BRR      : 0x00000000  [0x40011014]
LCKR     : 0x00000000  [0x40011018]
launch gdb. Note that a special one called " arm-none-eabi-gdb " is needed. I think gdb is really best with the "-tui" (text user interface) option turned on. Although not as cool as a full featured IDE such as Visual Studio, it is an impressive little text-based debugger.
cd ~/workspace/opendps/opendps
arm-none-eabi-gdb -d ./ -f opendps.elf -tui
then from the gdb prompt:
target remote localhost:3333
monitor reset init
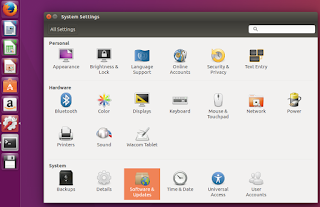
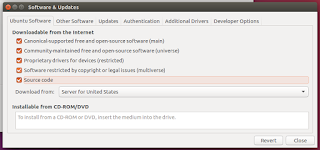
If more source code is desired (beyond that in the app itself), in Ubunto go to "System settings - Software and Updates"
and be sure "source" is selected:
E: You must put some 'source' URIs in your sources.list
WITH that setting, then you can do things like:
sudo apt-get build-dep gcc
sudo apt-get build-dep libusb-1.0-0-dev
sudo apt-get build-dep  gcc-arm-none-eabi
# this next command will typically install source code in your
# $USER\gcc-arm-none-eabi-4.9.3+svn231177
sudo apt-get source  gcc-arm-none-eabi
then in gdb:
directory gcc-arm-none-eabi-4.9.3+svn231177/src/libgcc/config/arm
I used that include directory as "ctrl-c" would typically break in this file:
../../../../src/libgcc/config/arm/ieee754-df.S
MYLOG=~/toolchain.log
sudo apt-get update  --assume-yes | tee -a $MYLOG
sudo apt-get install ssh  --assume-yes
sudo apt-get install xrdp  --assume-yes
sudo apt-get install samba samba-common-bin  --assume-yes
sudo apt-get install fail2ban  --assume-yes
sudo apt-get install binutils  --assume-yes
sudo apt-get install gcc  --assume-yes
sudo apt-get install gdb  --assume-yes
sudo apt-get install make  --assume-yes
sudo apt-get install build-essential  --assume-yes
sudo apt-get install python  --assume-yes
sudo apt-get install gawk  --assume-yes
(TODO - I plan to put the whole toolchain script on github) Additional resources and inspiration:
Copyright (c) gojimmypi all rights reserved. Blogger Image Move Cleaned: 5/3/2021 1:35:52 PM


