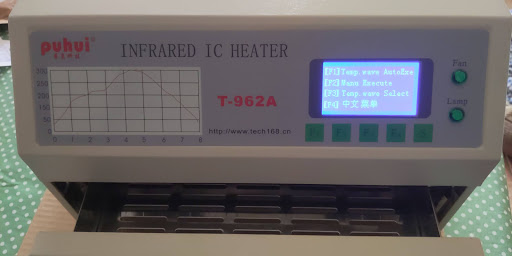
I bought my first-ever reflow oven!
I've been wanting to learn to solder SMD devices in a reflow oven for a long time. I've had my eyes on that toaster oven conversion for quite a while - to the point of having the target oven in my "save for later" cart at Amazon. In the end, I chose to buy a real oven.
There are tons of them for sale from a variety of vendors with probably an equal variety of reputations. I bought this one from the sm18595638214-4 seller on ebay for no particular reason other than 97%+ reputation and over 60 units sold. Despite the profile saying "Based in China", reading the small print it actually ships from USA. My oven was shipped from Southern California and arrived in only a few days via FedEx (shipping included in price!) The manufacturer is Tai'an Puhui Electric Technology Co., Ltd (see also their T-962 product page with quite a few PCBA machines for sale).
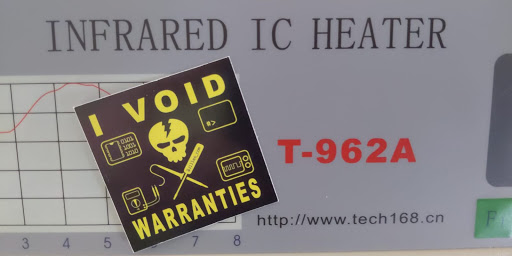
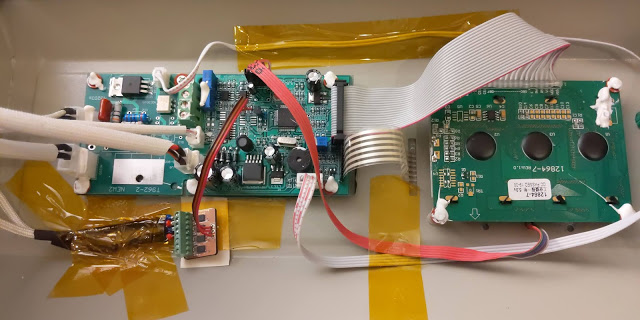
What's the first thing to do? Open it up and modify it, of course! I mean, seriously: how could this invitation be refused:
I received the Jilles stamp of approval:
All joking aside:
DANGER: there is high voltage, potentially lethal inside! Do not attempt modifications unless you have proper training. Ensure the power is always completely removed from the oven (not just turned off) when touching anything inside.
There are actually a variety of different methods for upgrading a T-962. These are my notes as I follow along the 1bitsquared Upgrading a T962a Reflow Oven blog. My notes here are somewhat of a supplement and note-to-future-self as his documentation is quite good. Still, I had my own questions and challenges.
I'd like to extend a special thanks to @esden for giving me a heads up when he had one of his Improved Thermocouple Interface boards for sale. He's a really great guy that I had the pleasure of meeting at the Hackaday Supercon. I highly recommend supporting him by shopping at 1bitsquared. Be sure to check out his twitch stream and discord (invite).
Thanks also to Unified Eningeering for the open source design on the Better Thermocouple Interface.
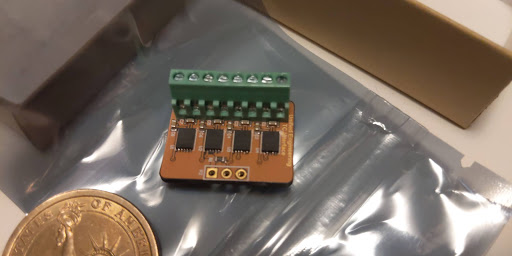
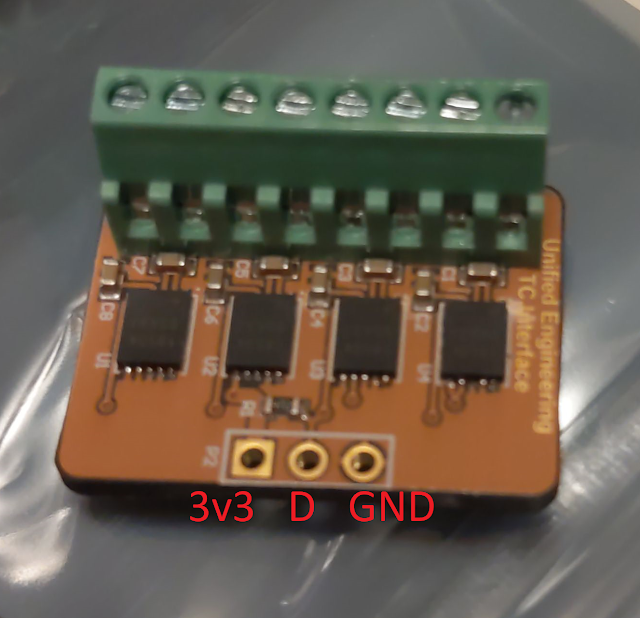
Here's a picture of my board made by Piotr:
It is tiny! Actually, I think it should really be a bit bigger. There's plenty of space in the oven, and I had a difficult time inserting the thermocouples (with relatively large connectors) into the green header. Note there are 4 channels available for thermocouples. The oven comes equipped with only two.
Essentials:
Optional Items:
- Additional pair of K-Type Thermocouples
- Grill Thermometer for calibration / verification
-
Replacement Fan
Things to review in advance:
My unit had some sharp edges on the drawer. Some fine sandpaper is wise to round them a bit so fingers are not cut.
I powered up the unit to make sure it was at least operational. The first thing I noticed is that the little fan is indeed rather loud. Unless the oven is used a lot, I later learned that this fan is only used to attempt to keep the cold junction as a reasonable temperature- so it could probably be removed altogether. Probably just as well to replace it.
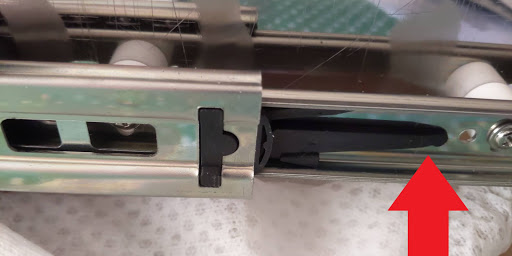
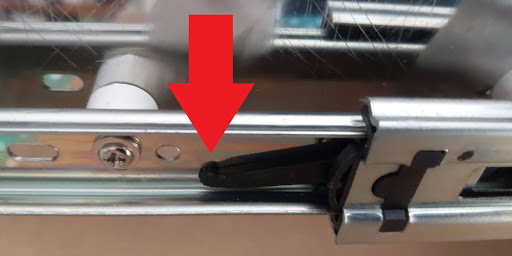
I had a difficult time removing the drawer. The instructions where to " lift the black latch". On my unit, the one on the left is released by pushing up. However the latch on the right is released by pushing down . I of course started on the right. Perhaps no big deal - but keep in mind the rails are also sticky with lubricant.
Push the black lever up on the left:
Push the black lever down on the right:
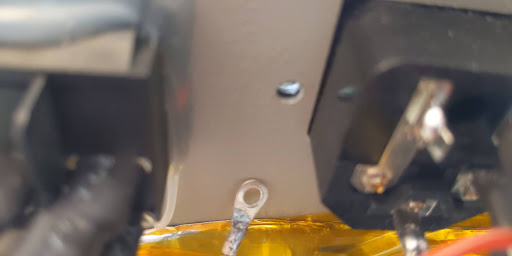
The first modification is probably the most important. Although my unit did have continuity from case to ground plug connection, there was pretty limited contact surface with the anodized case:
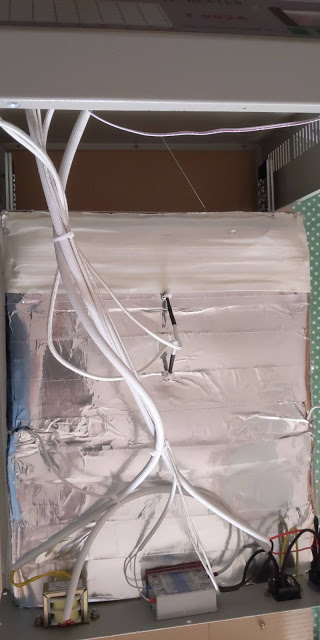
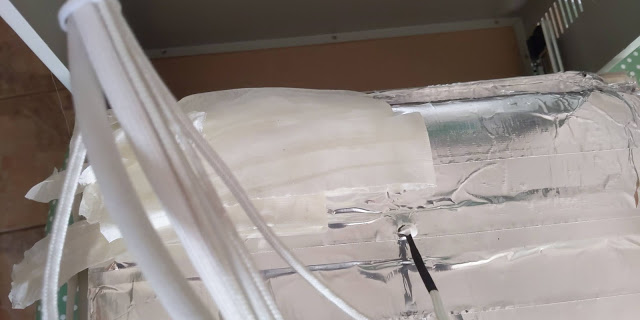
Although my unit was apparently assembled just last year, in September of 2019, the was a ton of the masking tape, just as described in other blogs. I had hoped the manufacturer would have changed this as there are so many comments on the bad smell of the heated masking tape once the oven is in use.
Be careful pulling it off to ensure the aluminium foil does not tear:
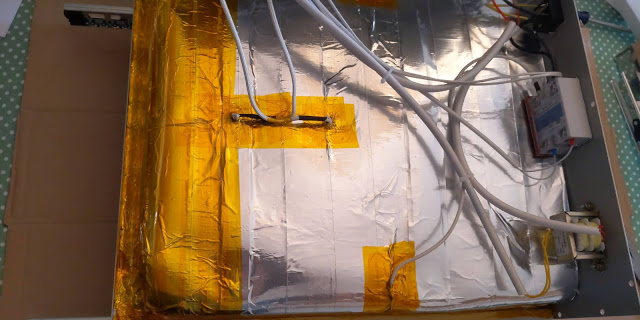
One roll of kapton tape was more than enough to replace the masking tape to insulate the electronics from the aluminum foil. I use a bit extra as additional strain relief on the thermocouple wires:
Regarding the fan
install, I suggest doing this first. Mine was so obnoxiously load I ended up cutting the wires just to silent it. (There's no fan check circuitry) Oh, and this specific fan needs to have the hole drilled out with a 1/8" bit. Perhaps the existing screws could be force-tapped into the plastic, but I didn't want to break it.
Piotr mentions disconnecting the solid state relay connection, but does say why. Putting my board into bootloader mode immediately shows why this is a good idea: mine turned on! I'm glad the SSR was disconnected. It was a bit startling, as I had never heard the large fan running. Other than the power-up test, I proceeded directly to modification.
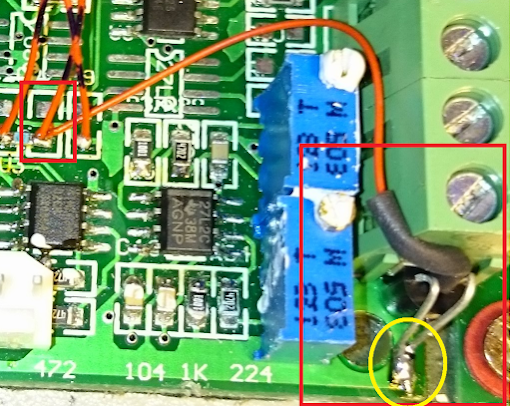
Perhaps you've noticed this in the better thermocouple interface page:
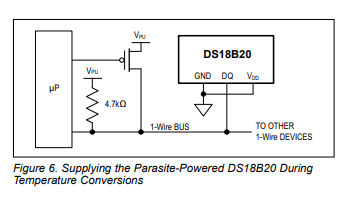
That's the cold-junction sensor down in the lower right. But notice the yellow circle. It sure looks like the Vdd and GND pins are tied together to ground. Sure enough, this is consistent with the schematic in that both DS18B20 pins are grounded. This is a clever idea, as from the datasheet (see page 7), this device has a parasite mode:
Still, it may not be clear as to why this cold junction sensor is on the main board, at the old junction, and not on the new mod board. It is a leftover from a prior upgrade, as there's a note "the cold-junction sensor is still present on my board, but not used when the external TC IF is detected".
Ok, so on to the upgrade!
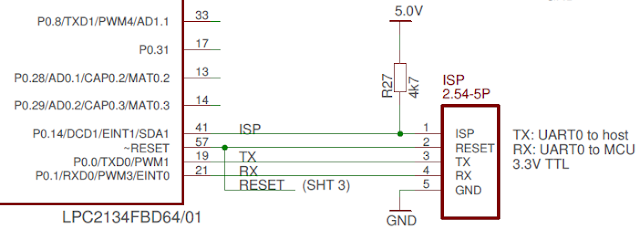
Key to the firmware upgrade is the ISP connector:
Although a variety of hardware programmers are possible, I used a simple USB to TTL device and manually fiddled with the ISP and Reset lines.
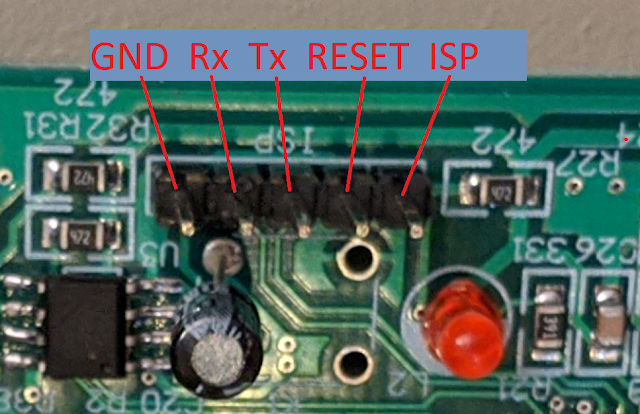
Fortunately the manufacturer kindly installed a header. Here's a picture of it on the board:
As usual, the connections are "crossover": Connect Tx (Transmit) of the USB device to the Rx (Receive) on the board, and Rx to Tx.
WARNING: Is is never a good idea to attempt to communicate or flash a device that is not already powered up.
From the factory, the new firmware is programmed with FlashMagic by:
- Connect ISP to ground
- Momentarily connect RESET to ground
- Release ISP from ground
The the new firmware, the unit should be able to go into bootloader mode by holding down the F1 when turning on the oven.
For more details, see the UnifiedEngineering Flashing the LPC21xx controller.
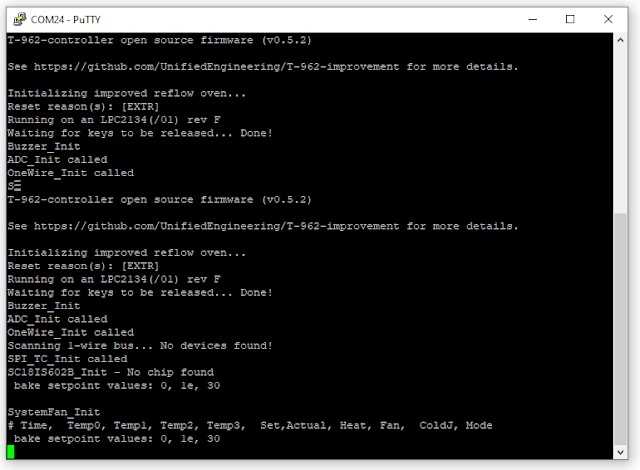
After the new firmware is in place, run it by again bringing the RESET line momentarily low (to ground). To see the bootup messages, run Putty at 115200 8N1. The FlashMagic software may need to be shutdown if it still has the USB device in use.
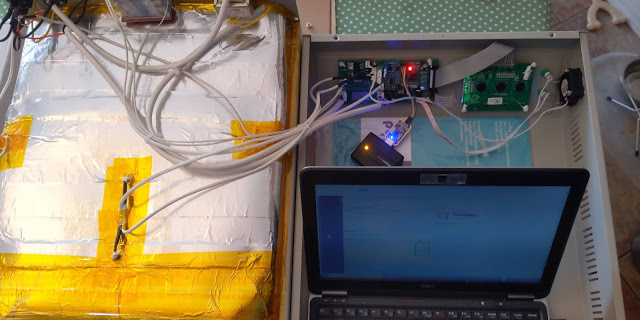
Here's my setup:
Not shown: I used another USB device (the SPIDriver) that has a couple of header pins exposed for ground connections.
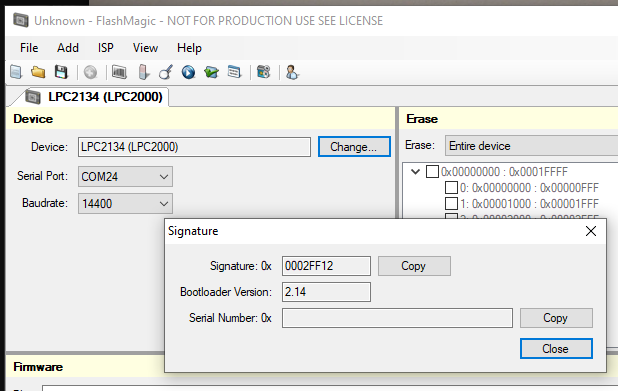
My first attempt was to see if the FlashMagic could see my device. I was initially concerned that my software only showed half the number of communication parameters. Perhaps they only show up if you have a hardware programmer plugged in? In any case, I had no opportunity to select an interface or oscillator frequency as shown in the Flashing the LPC21xx controller section of the UnifiedEngineering T-962-improvements wiki. Note the device selected is the LPC2134:
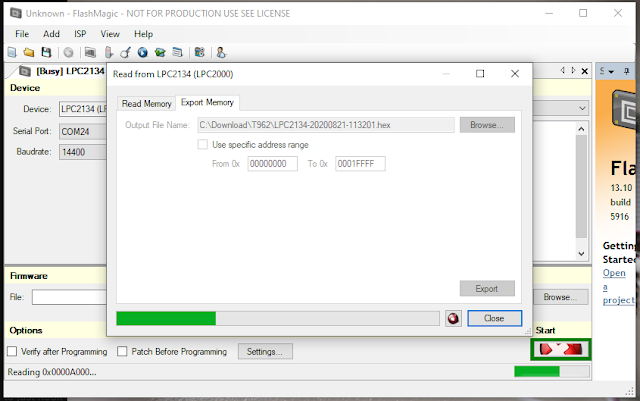
Next, "just in case" something went wrong (or you never know, you might need that someday), I saved the original firmware. Twice. Click on ISP - Read, and then click on the Export Memory tab:
The next step could be a point of no return. Hey, we're here to void warranties, right?
For my first attempt, I used known good file (version 0.5.2) from the assets on the releases page, last built in 2018.
If instead you want to build the firmware from scratch (here shown for WSL):
// over a gig of disk space is needed iss you don't have gcc-arm-none-eabi already installed
sudo apt-get update
sudo apt-get upgrade
sudo apt-get install binutils-arm-none-eabi
sudo apt-get install gcc-arm-none-eabi
cd /mnt/c/workspace/
cd T-962-improvements
make
// see file: ./build/T-962-controller.hex
The compiled current code in GitHub did *not* match the releases file for me.
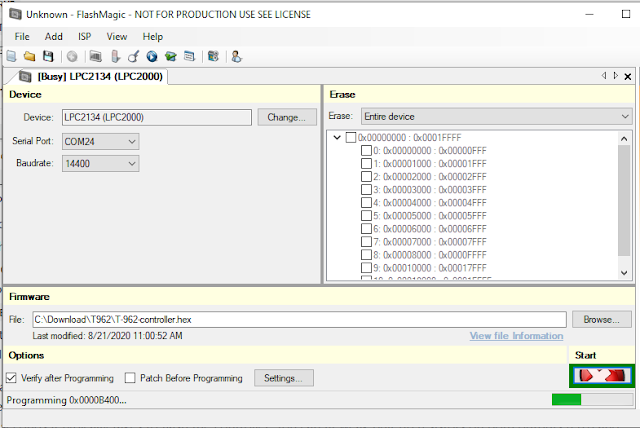
Somewhat surprisingly, the upload of firmware went really quite smoothly, despite my software missing half of the available parameters:
When the FlashMagic app is sized relatively small - note the "Start" button to begin upload is in the lower right may not be immediately obvious.
I had initially upgraded the firmware before installing the 1bitsquared Improved Thermocouple Interface upgrade module. As everything seems to work well, I proceeded with that modification.
The 3 connections of interest are power, ground, and data:
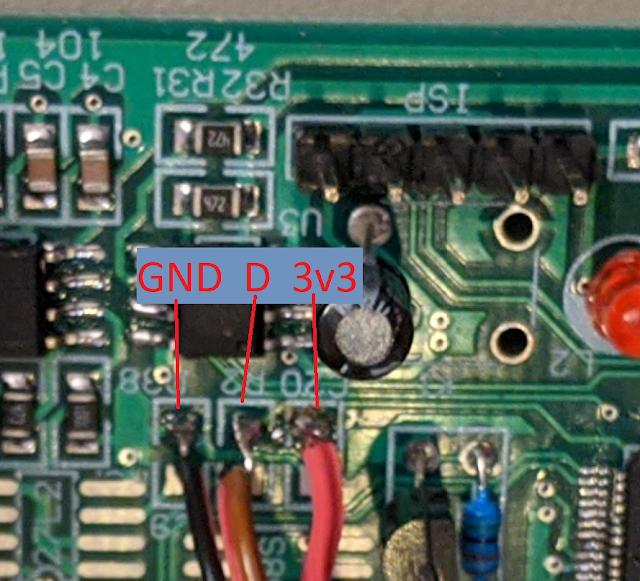
Another seeming invitation to modification was the convenient 3 square pads, shown with my wires already connected:
Connection of the board was pretty straightforward. Here's the an initial working modification:
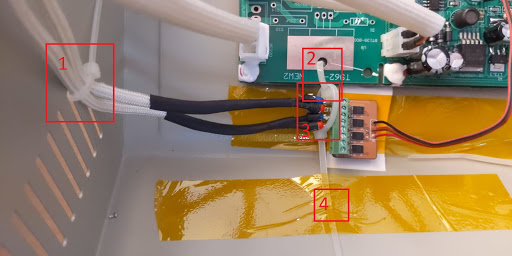
Edit: I didn't really like the tape method shown above for the new thermocouple interface, as the tape does not stick as well to the cabinet as one might like. So I added these tie wraps:
Note the main strain relief (1) for the fairly rigid thermocouple wires. There's another tie-wrap (2) in the empty PCB hole - positioned to keep the next tie wrap (3) on the thermocouple wires away from the main PCB. This tie wrap has the respective tail taped down as an extra measure of stability. In addition to the kapton tape underneath, there's a small piece of card stock under the tape (part of the fan packaging was used here) for additional electrical insulation. By far the (1) tie-wrap does most of the work to keep the new interface board in a stable position.
A better solution would be to drill a couple of mounting holes instead of the (2) and (3) tie wraps. I will probably do that when my other 2 K-Type thermocouples arrive. Alternatively, cable management clips might work (depending the strength of the adhesive)
Back to the project blog from that initially working state...
However this is where things took a turn for the worse. I powered on the unit. The display was blank! Oh no! How could that be? I took a short break to think about it. Was this the end? $400 down the toilet?
I refused to give up. I'm not new at this. Prior to being only a software engineer, I spent nearly a decade at a small industrial manufacturing company, building and repairing all sorts of crazy things big and small. I didn't do anything wrong here. No magic smoke, no mishaps. What went wrong?
So ok, let's backtrack. What's different? Well the Thermocouple board is connected, but duh, how could that affect this display. It shouldn't... but let's go back to a known working state. I removed the board. Nothing. Still a blank display at power up. No fun if it is too easy, right? Could it have damaged the display? No way.
Perhaps the firmware got corrupted and crashed? I hooked up the computer again, flashed fresh firmware. Success! Ok, cool, that was odd, but let's proceed.
I reconnected thee thermocouple board. The display was blank again! Are you kidding me? So let's repeat the routine: remove thermocouple board, fresh firmware, it works! Ok, fool me once...
Clearly something else going on here. So instead of flashing firmware, I hooked up that serial port to see what sort of messages are displayed at startup time. It's completely happy! No indication of problem, erm - other than the blank display.
How can that be? Well, since I had everything hooked up again, it was easier to restart by bringing the RESET pin low, instead of reaching for the power switch. Success! Yes, after a reset - the display works just fine. This was never about the external board or the firmware. It was always about the after-powerup reset.That certainly falls into the undesired feature category.
How can this be a problem? The factory firmware certainly did not have this issue. The Microcontoller does indeed have reset startup circuity built in. Is this is a software issue or a hardware issue?
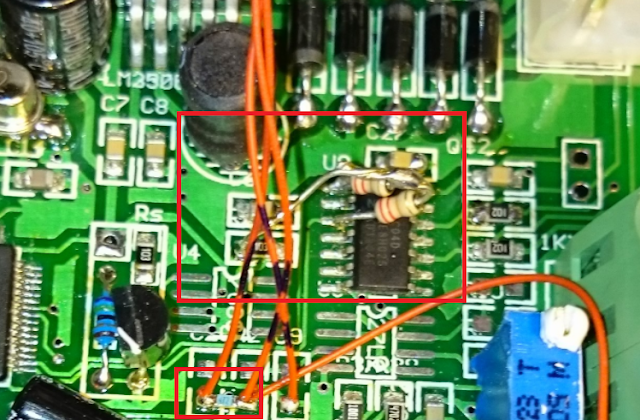
There's a mystery mod that I have not been able to identify:
I remember seeing these resistors when reading about the mod before ordering my oven. Note not only the radial-lead resistors tacked on o the chip, but there's also a small SMD (probably a pullup) on the thermocouple board connection. I wonder what they do? Surely resistors alone will not resolve the new-found reset problem.
I'm not the first person to encounter this issue, however @tnt completed this process in January with no problems (but he also built from the git repo).
Ok, so I needed find a solution for the reset problem. Perhaps some sort of RC delay? That seems too hackish. It may be temperature related, as upon fresh power up later in the day, I didn't the reset problem at all. The display is working fine. Even waiting only a couple of second after power down and turning on the oven - the display is working fine. Then few hours later, the display problem had returned! This time it may have been in bootloader mode as the big fan came on while the display was blank and the heater came on!! I thought that the problem may be related to my franken-ribbon cable on the ISP (see below) - but no, removing that completely and random startup problem remained.
Reminder: The display is supposed to be blank in bootloader mode. But the unit should never boot into bootloader mode when simply powering up.
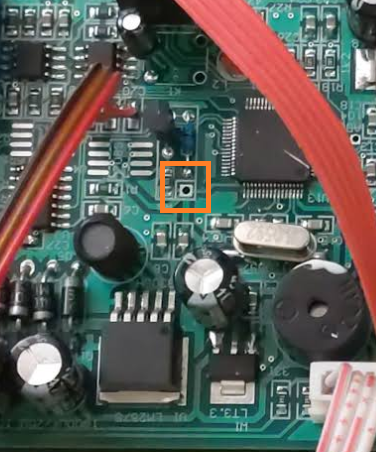
Ok, so if we take another look at the reset circuitry (above)... well, there is none. ~RESET on pin 57 appears to just go straight to the header.
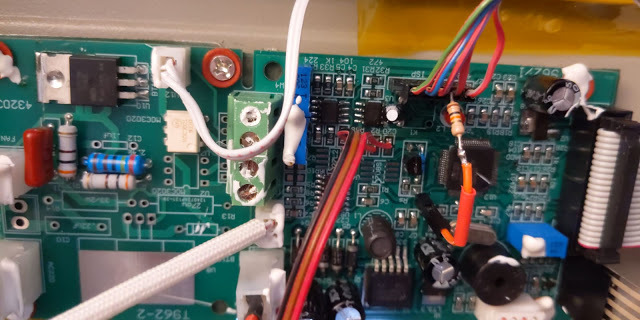
Two of the most common solutions to the worlds problems are (1) decoupling capacitors and (2) pullup resistors. Pullup it is! As it turned out, there's a large through-hole nearby that has 3v3 available:
I crimped a 10K resistor to the header connector on the reset line. Here is is with the heat-shrink insulation not yet in place:
Voila! So far, so good! I've not yet seen the blank display problem return!
As the header access is buried inside, I wanted something a bit more accessible. I started this portion of the project early on - long before I know about the reset problem.
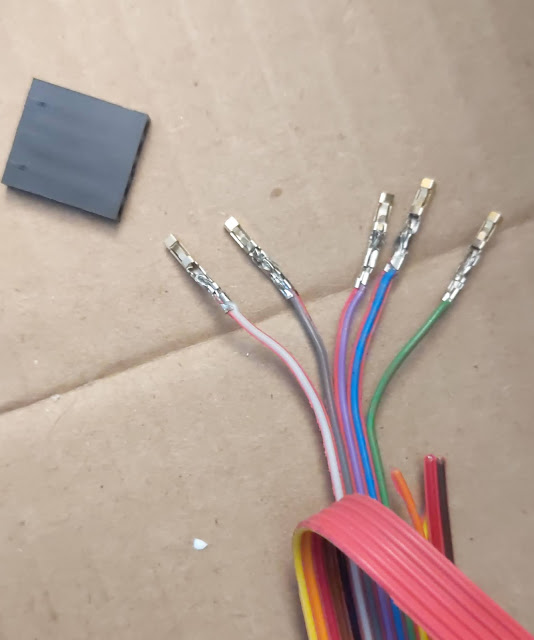
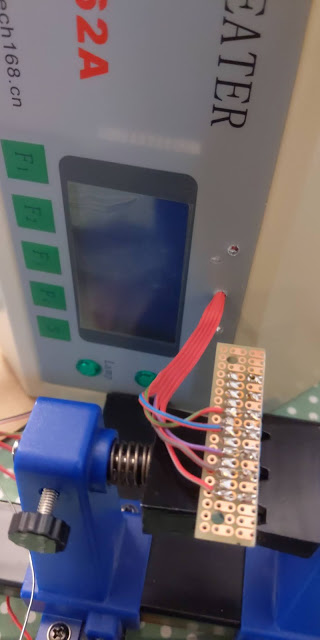
I spent a relatively large percentage of the upgrade time manually assembling the header cable and assembly:
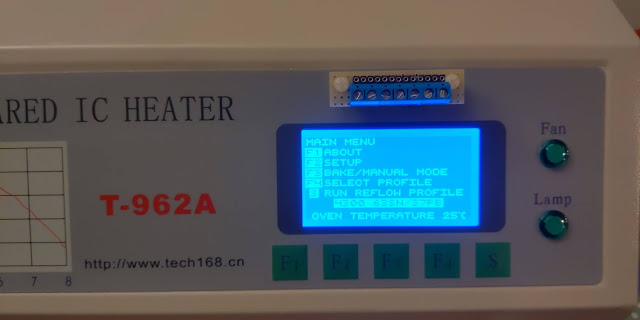
If there was ever something to void my warranty, I'm pretty sure the holes drilled in the front panel did it:
In the end I have a reflow oven that is immediately recognized as mine:
A little "Frankenstien-ish", no?
That front-panel mounted PCB was probably not my ideal choice. I had considered something on the back of the unit where it belongs, but really, all of the electronics are at the front. A rear mount would need long cables routed. My ideal solution would have been a recessed header, perhaps even with some sort of protective trap door cover. Alas I don't have anything to poke a square hole into the case. I used what I had on hand.
Note the manufacturer-supplied manual included this text:
Attention: This machine can't be used to solder components (like chips with metal encapsulation of strong reflective material) and the "plastic plug in board" which can't be heated up to temperatures of 250 degrees centigrade"
Copyright (c) gojimmypi all rights reserved. Blogger Image Move Cleaned: 5/3/2021 1:35:54 PM


